However, connecting to the server once established is slightly more difficult. The following tutorial covers how to do so on a Windows machine.
Using Putty
Almost anyone who has to connect to a Linux machine from a Windows machine will tell you that you should use Putty to get the job done. Although Amazon does have a Java Client that will run through the web browser, it is almost not even worth the hassle of ensuring that Java is going to be working with your browser. Also, putty is free and easy to use and doesn't require you to login after set up.
To begin, download Putty from this website (I would recommend downloading the putty.exe under the Intel x86 heading as this is very lightweight and easy to use). You will also want to download PuTTYgen (note that link will download it for you). Also, locate the key-pair created when your Linux machine was created. It should be something like [keyname].pem.
Do the following:
- Open up Puttygen.
- Click on the load button and navigate to the location where your keypair is stored.

- You will notice that you do not see your .pem file listed. That is because Puttygen is looking for .ppk files. Change the file type to All Files.

- Select the correct .pem file and press Open. A message box will appear telling you that you have loaded your key successfully.
- Next you will click on the Save Private Key button. Save it to whatever you want to call it with the extension .ppk.


Now you are ready to make a putty connection:
- Open up putty.exe.
- Click on Run when the message box appears.
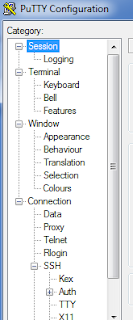
- The putty configuration screen should appear.

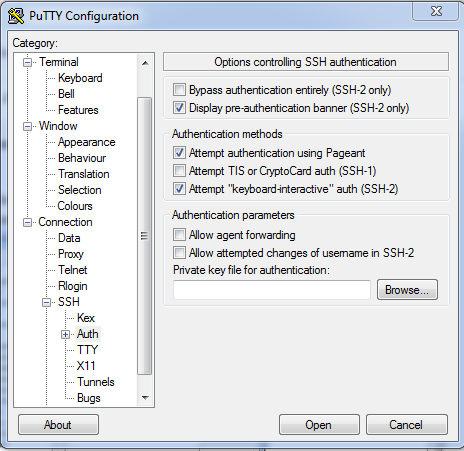
- Click on the Connection Node and then on SSH. You should see a screen as follows.

- Click the Browse button and select the .ppk file created in the beginning of this tutorial.
- Open up the Amazon EC2 management console. Click on Instances on the side bar to the left.

- Click on the instance that you wish to connect to. At the bottom of the screen you will see a tab that contains information about the instance. For security purposes, I have only captured a portion of this screen to demonstrate. You will want to copy the URL found in this information.

- Go back to the putty configuration and click on the Session option again in the left side bar.
- In the Host Name (or IP address) field, paste the URL copied from step 7.

- Next enter a name for this session in the Saved Sessions field.

- Click Save.
- Click on the newly created saved session and then click Open.
- If you have not connected to the server before a security window will pop up stating something about how the server is not in the cache and if you want to add it. Click yes and continue.
- If you are connecting to a Ubuntu instance, then the login screen will ask for a user, and you will enter ubuntu. Look up what user you will log in as on each instances basis.


Using WinSCP
Winscp is another free program that works very similar to putty in that it uses what is called an ssh session to connect you to the remote server. The major difference between WinSCP and putty is that putty can run programs and commands on a command line whereas WinSCP is simply a file browser. If you are familiar with FTP clients like Filezilla then you understand the concept behind WinSCP.
To begin, download directly here by clicking WinSCP, or download it from this site (be sure to choose the first option of Installer). Run the set up by clicking through all the screens. It may ask to install some toolbars, check no for those (I can't remember if it does or not).
Do the following:
- Open WinSCP.
- Once opened, make sure that you are on the Session node found in the left side bar.

- Enter the url found from step 7 above in the Host Name field.
- If you look in the Private Key File field you will notice a little button with three dots at the far right, click on that to open up a file browser window. Locate the .ppk file generated at the beginning of this tutorial and click open.
- At the bottom of the screen click the Save button. A new window will pop up asking you to name the session. Save is as whatever you want.

- This will take you to the Stored Session tab. You will see all your stored sessions here. Click on the newly created session and then click login.

- If you have not connected to the server before a security window will pop up stating something about how the server is not in the cache and if you want to add it. Click yes and continue.
- You should now be able to see a view of your computer's filesystem and that of the remote servers.

- If you did everything right, you should be able to close and reopen WinSCP and see the session under the Stored Session node.


That is really all there is to it when connecting to the servers. Hope this helped.
No comments:
Post a Comment