Part of the great love that I have for the technology industry is just how willing people are to help each other, evidenced by the plethora of tutorials out there on just about any and every subject. Entire websites are devoted to answering any question that may be asked (think stackoverflow.com). Twitter has various different feeds that answer technical questions for a variety of products, and people troll these feeds and provide almost real-time answers.
But my major problem with online help is just how shoddy, piecemeal, and incomplete almost all of it is. Want to know how to connect to a server remotely? There is a tutorial for that, but what if that server is not typical? Then you are HOSED! Though this is a relatively minor example, and one that isn't actually all that hard, it nevertheless illustrates the gaping hole found in most tutorials in that they don't explain the underlying structure of the tutorial and so moving outside of that tutorial can be near impossible for the newbie (which, if you are looking up tutorials in the first place, you almost certainly are).
So here is my deal: I want to do online tutorials and documentations in a more excellent manor. I realize that some people don't want an explanation behind what is going on in the tutorial, they just want to know how it is done. That is fine, most of those people can either look elsewhere or just skip over the meaningful explanations I hope to provide.
In addition to go deeper in my tutorials, I also want to provide explanations in layman's terms so that anyone can read them and understand what is going on. That will mean that some technical folks will not appreciate my writing style or may possibly think it is condescending. It is not my intent to condescend, but rather to write to a level that I know from much experience will be beneficial to many others. Too often technical writers assume that the user is a technical person, making the explanation inaccessible to those not advanced enough for the writing.
My aims in the different tutorials that I will write and publish is to share what knowledge I have gained along my way to technical understanding, and to hopefully do so in a maximally accessible way. Feel free to comment/share/take any and all code/resources/material posted. It is free and I want it to stay that way. If you want to cite me, that is fine, but I really don't care. Just try and help a fellow newb out along the way.
Wednesday, July 24, 2013
How To Connect to an Amazon EC2 Server
As part of my internship I have been required to set up and maintain a variety of cloud based services. One of these services is an Amazon AWS EC2 Linux server, Ubuntu 12.04. Set up for this server was easy and instructions to set one up can be found here (they are so easy to follow that I am not going to cover it). A Quick Note: You will want to download the key pair generated for your server instance as this will be used later. This key is not stored anywhere, so be sure to download once created.
However, connecting to the server once established is slightly more difficult. The following tutorial covers how to do so on a Windows machine.
However, connecting to the server once established is slightly more difficult. The following tutorial covers how to do so on a Windows machine.
Using Putty
Almost anyone who has to connect to a Linux machine from a Windows machine will tell you that you should use Putty to get the job done. Although Amazon does have a Java Client that will run through the web browser, it is almost not even worth the hassle of ensuring that Java is going to be working with your browser. Also, putty is free and easy to use and doesn't require you to login after set up.
To begin, download Putty from this website (I would recommend downloading the putty.exe under the Intel x86 heading as this is very lightweight and easy to use). You will also want to download PuTTYgen (note that link will download it for you). Also, locate the key-pair created when your Linux machine was created. It should be something like [keyname].pem.
Do the following:
- Open up Puttygen.
- Click on the load button and navigate to the location where your keypair is stored.

- You will notice that you do not see your .pem file listed. That is because Puttygen is looking for .ppk files. Change the file type to All Files.

- Select the correct .pem file and press Open. A message box will appear telling you that you have loaded your key successfully.
- Next you will click on the Save Private Key button. Save it to whatever you want to call it with the extension .ppk.


Now you are ready to make a putty connection:
- Open up putty.exe.
- Click on Run when the message box appears.
- The putty configuration screen should appear.

- Click on the Connection Node and then on SSH. You should see a screen as follows.

- Click the Browse button and select the .ppk file created in the beginning of this tutorial.
- Open up the Amazon EC2 management console. Click on Instances on the side bar to the left.

- Click on the instance that you wish to connect to. At the bottom of the screen you will see a tab that contains information about the instance. For security purposes, I have only captured a portion of this screen to demonstrate. You will want to copy the URL found in this information.

- Go back to the putty configuration and click on the Session option again in the left side bar.

- In the Host Name (or IP address) field, paste the URL copied from step 7.

- Next enter a name for this session in the Saved Sessions field.

- Click Save.
- Click on the newly created saved session and then click Open.
- If you have not connected to the server before a security window will pop up stating something about how the server is not in the cache and if you want to add it. Click yes and continue.
- If you are connecting to a Ubuntu instance, then the login screen will ask for a user, and you will enter ubuntu. Look up what user you will log in as on each instances basis.


Using WinSCP
Winscp is another free program that works very similar to putty in that it uses what is called an ssh session to connect you to the remote server. The major difference between WinSCP and putty is that putty can run programs and commands on a command line whereas WinSCP is simply a file browser. If you are familiar with FTP clients like Filezilla then you understand the concept behind WinSCP.
To begin, download directly here by clicking WinSCP, or download it from this site (be sure to choose the first option of Installer). Run the set up by clicking through all the screens. It may ask to install some toolbars, check no for those (I can't remember if it does or not).
Do the following:
- Open WinSCP.
- Once opened, make sure that you are on the Session node found in the left side bar.

- Enter the url found from step 7 above in the Host Name field.
- If you look in the Private Key File field you will notice a little button with three dots at the far right, click on that to open up a file browser window. Locate the .ppk file generated at the beginning of this tutorial and click open.
- At the bottom of the screen click the Save button. A new window will pop up asking you to name the session. Save is as whatever you want.

- This will take you to the Stored Session tab. You will see all your stored sessions here. Click on the newly created session and then click login.

- If you have not connected to the server before a security window will pop up stating something about how the server is not in the cache and if you want to add it. Click yes and continue.
- You should now be able to see a view of your computer's filesystem and that of the remote servers.

- If you did everything right, you should be able to close and reopen WinSCP and see the session under the Stored Session node.


That is really all there is to it when connecting to the servers. Hope this helped.
Automating Internet Explorer (Setup)
The initial problem with automating Internet Explorer (IE)
is that IE is a mess; and when I say a mess, I mean it is like the drunken
celebrity whose career is slowly dying in the tabloid sections of the
supermarket. What was initially meant to be the premier browser for the
internet has ballooned to this bloated mess of a browser we know and grudgingly
use today.
The history of IE is something that many bloggers have
touched on, and it is almost universally accepted in the tech community as the last-resort
browser, used only when some legacy system requires its use. But for the
purpose of automation, it is the best option we have. There are probably
multiple different ways to automate other browsers, possibly even using bash
scripting or something like that; but I, like most people, do not have any
knowledge of these systems. Microsoft has done a lot of work in providing a
base from which we can automate IE, so why not attempt to use the framework
they have built?
I will eventually add some more technical articles to this
post that will help outline the structure and core of VBA. This post, however,
will largely skip over the technical aspects of what is going on and simply
outline how to perform the task at hand. You will need to read some posts to
catch up to speed on how to set up VBA and what objects are to make sense of
some of the explanations used herein, but I will attempt to keep it as
low-level as possible.
Step 1 – The IE and Browser References
Visual Basic for Applications (VBA) has a reference for some
useful objects and functions that will assist us in creating our IE automation.
To add these references, go to Tools under the VBA development window (see here
for explanation on how to get to this) and select References:
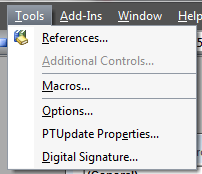
This will bring up a window with a list of References,
listed in alphabetical order. You will want to select the following: 1)
Microsoft Internet Controls, 2) Microsoft HTML Object Library, and 3) Microsoft
Scripting Runtime .

Note that the top four references come standard with all VBA
projects.
Explanation of References
You may skip this section if you do not wish for more information
on what these references do. It is not essential that you know what they do,
but it is useful to have background on them. Each reference is provided with a link
that leads to a more technical explanation of each.
Microsoft
HTML Object Library gives you access to the objects found in an HTML
document. This is crucial since any navigation across a webpage is done through
the nodes of the DOM. Don’t worry if you don’t understand what this means, just
think of it like this: the DOM (which stands
for Document Object Model) is a building that contains information, and each
node is a doorway that leads to a specific part of that information. Navigating
this building (also known as traversing the DOM) is done through methods
defined in this reference.
Microsoft
Internet Controls is what allows you to control IE without ever having
to click on the icon and clicking on the window that would appear (also known
as creating an instance of IE that can be manipulated programmatically). This
object is the backbone to automating IE as it allows you to interact with the
web as though you were actually viewing the page inside the browser, but with
the key difference in that the computer will just be simulating your actions.
There is another object called WebBrowser that can be used, but my initial
research seemed to indicate that this object is outdated. Therefore, we will
only use the InternetExplorer object found in this reference library.
Microsoft
Scripting Runtime provides access to the filesystem (or more generally
the folders on your hard drive) of your computer. Though not technically
necessary when automating IE, it is useful to be able to open and move files
that have been downloaded from the internet.
Step 2 – IE as Class Module
To begin the setup, create a new Class Module and name it
something that will help you know that it is an object used for automation
(i.e. WebAgent, IE, IEObject, BrowseMeDaily… whatever you want). For this Demo
we will refer to it simply as IEAgent. To do this, right-click on your project
anywhere within the Project Explorer on the left-hand side of the screen and
select Insert > Class Module (highlighted below).

Above - Insert Class Module


Above – Change the Class Module name from Class1 to whatever you want (in this case, IE Agent).
There are many advantages to making IE a class module versus
a regular module. The most important reason for making IE a class module is
that it allows you to use the same instance of IE across multiple modules
(which is important as we will see in subsequent posts). Since we are choosing
to make IE a Class Module, we will also be able to use some useful code bites
by calling a method found in the Class module instead of having to write that
code block every time we use IE.
Since there are so many reasons for creating a
Class Module over a regular module for IE I will not enumerate all of them. But
remember this pattern in VBA: if you intend to use something as if it were a
standalone object, then it should be a class module; if you want to do
something that any object should be able to do (like open a file) then it
should be in a module. This is the argument between static and non-static
classes in other languages such as Java.
Step 3 – Creating the Basic Structure for Automating IE
This step is where we will actually start writing code.
Attached is the module we have written to be found in plaintext form on a
shared google doc (blogspot does not support file sharing, so this is a sort of
hack). If you wish to skip this step and just download this agent, feel free to
do so.
To begin, we must declare some simple variables that will be
used in this object, such as the IE object defined in the Microsoft HTML Object Library. Other useful variables will be to
define a number variable that will store the process number the IE object will
run on. What this means is this: an operating system keeps track of what
programs are running by placing each program (or process) in a table and
assigning it a number. Whenever we will create this IEAgent, it will create a
new IE browser process that the computer will then keep track of by referencing
the number it was given upon creation (also known as the process handle). Don’t
worry if you don’t understand what this means, just know that it will be used
to track the creation of IE in a way that we will be able to interact with it in
a different way that will be useful later.
Begin by typing the following:
Dim ie as internetexplorer
Dim handle as Long
Dim handle as Long
You may notice that as you type internetexplorer a popup box
appears that changes as you type in the name of the object. This is called
intellisense, and is used to help developers determine what objects,
properties, or methods are available to them in this context. Though the VBA
intellisense is weaksauce compared to other development environments, it is
still useful After typing in a few letters after the As you will be able to
arrow down to the correct object and press TAB
or Enter.
Enter the following line of code after the variables:
Private Declare Function SetForegroundWindow Lib
"user32" (ByVal hwnd As Long) As Long
This calls what is referred to as an API that will be used
to open up webpages in multiple tabs. It is not necessary to this post to
understand or even know what this line does, but in essence it will enable us
to grab IE as if it was the window we were currently using (called Focus – it determines
what window you are writing in/clicking in, etc.). Doing so makes some user
functions like hotkeys programmable. So if you want to send a hotkey such as
PageDown to IE, this API will be needed to do so.
Next define the following methods:
Private Sub Class_Initialize()
Set ie = CreateObject("internetexplorer.application")
handle= ie.hwnd
End Sub
Set ie = CreateObject("internetexplorer.application")
handle= ie.hwnd
End Sub
Private Sub Class_Terminate()
ie.Quit
Set ie = Nothing
End Sub
ie.Quit
Set ie = Nothing
End Sub
Since IEAgent is a class module, we can run code upon the
creation of the IEAgent Object (this is called instantiation, or setting up of
object settings). This will both create and destroy the object as necessary.
With this code, you have successfully completed the setup of
the IE automation object. The next few posts will be discussing how to flesh
out the object to make it do what we want.
Automating Internet Explorer (Add IE Controls)
After having built out a shell for the Internet Explorer
(IE) object in a class module, we are now ready to start adding some useful
functionality. It is important to note that without adding these methods the IE
Agent will not be able to perform any functions other than being created as the
actual IE object is hidden behind the IE Agent (see my previous post about
setting up an IE Agent).
Some key features we will focus on is wrapping up code
blocks inside methods that would normally have to be written out every time you
would call the basic IE methods on the reference IE object discussed
previously. Other methods will focus around navigating the DOM, opening up
tabs, and opening up webpages.
Adding Basic Browsing Functionality
Some of the basic functions of IE are 1) opening web pages,
2) opening web pages in new tabs, 3) changing the state of the webpage through
clicking on buttons, table cells, etc., and 4) downloading files from a remote
server. Each of these functions are performed in a browser via mouseclicks and
keyboard input. But during automation you cannot do any of these things using a
mouse or a keyboard. Thus we are given a framework from which we can do all of
these things programmatically.
Opening Web Pages
The most basic function of the browser is to open a webpage.
This is a relatively straightforward event for someone using a browser, and so
it is also fairly straightforward for automation. However, there are some
issues that a human will be able to overcome intuitively that a script
automation must account for, such as waiting for a page to load.
To begin, pull up the IEAgent we developed in the previous
post. Since IE needs to load the page completely before any actions can occur,
it is necessary to write a wait method. Add this code to your module below:
Sub waitForLoad()
'pauses the exection of the code until the webpage has loaded
Do
If Not ie.Busy And ie.ReadyState = 4 Then
application.Wait (Now + TimeValue("00:00:01"))
If Not ie.Busy And ie.ReadyState = 4 Then
Exit Do
End If
End If
DoEvents
Loop
End Sub
'pauses the exection of the code until the webpage has loaded
Do
If Not ie.Busy And ie.ReadyState = 4 Then
application.Wait (Now + TimeValue("00:00:01"))
If Not ie.Busy And ie.ReadyState = 4 Then
Exit Do
End If
End If
DoEvents
Loop
End Sub
The above code enters a loop that checks the state of IE
every millisecond (which is an eternity in computer time) and won’t give up
control of the program until IE is ready. Note that the IE object was defined
during the setup of the IEAgent. This function will be used multiple times
within the IEAgent as well as in the parts of a script where the IEAgent is
used.
Next we will add a method that will accept an URL Address and
then opens the page. This will employ the previous method so that nothing will
happen to the page until it is fully loaded.
Sub openpage(url As String)
'opens the specified url in internet explorer
ie.navigate url
waitForLoad
End Sub
'opens the specified url in internet explorer
ie.navigate url
waitForLoad
End Sub
The function called on the IE object (navigate) is a
predefined function written by Microsoft to aid developers. You don’t have to
worry at all about what is going on underneath, just know that it will open any
page that you normally would through regular browsing. It then calls the
waitForLoad function, thus allowing the page to be in a ready state before any
other functions are called.
Advanced Page Loading
Microsoft has provided many ways for someone to write code
to automate a process. This is nice as it lends itself to be highly extendable
to other areas, but it also means that some things aren’t available in one
method that is available in another. The following is a means to open up a
webpage using what is called a shell object. For most uses the previous version
will suffice, but use of the shell opens up possibilities such as opening
multiple windows or tabs at once. Other advantages include using an already
open instance of IE by grabbing it’s handle (handles discussed in previous post).
Don’t worry about knowing what a shell is or how it is
implemented, but if you want to do some of these things, then adding this code
is necessary. My suggestion is to add it as it is not a whole lot of code and
will give your code more flexibility to work in the future.
To start, add these two lines above the variables defined at
the top of the IEAgent.
Private Declare Sub Sleep Lib "kernel32" (ByVal
dwMilliseconds As Long)
Private Declare Function ShellExecute Lib "shell32.dll" Alias "ShellExecuteA" (ByVal hwnd As Long, ByVal lpOperation As String, ByVal lpFile As String, ByVal lpParameters As String, ByVal lpDirectory As String, ByVal nShowCmd As Long) As Long
Private Declare Function ShellExecute Lib "shell32.dll" Alias "ShellExecuteA" (ByVal hwnd As Long, ByVal lpOperation As String, ByVal lpFile As String, ByVal lpParameters As String, ByVal lpDirectory As String, ByVal nShowCmd As Long) As Long
The top of your IEAgent should now look something like this:

These are additional APIs used to provide access to the
shell objects built in to Windows and to provide a function to stall the
execution of the program. These have many parameters that are needed, but the
provided example will do the job in opening up additional tabs within an
instance of IE.
Sub openPageInTab(url as String, newHandle as long)
Sleep 1000
ShellExecute newHandle, "open", url, vbNullString, vbNullString, vbMaximizedFocus
End Sub
Sleep 1000
ShellExecute newHandle, "open", url, vbNullString, vbNullString, vbMaximizedFocus
End Sub
This article
provides additional information on the ShellExecute function. For our purposes,
this will take a URL and open up a tab in the browser with the given handle. To
open up a new tab using the IEAgent, you will call this code as follows:
openPageInTab(“www.google.com” , handle)
The url will lead to google.com, and the handle is the
handle defined at the top of the IEAgent as shown in the picture above.
Remember that this handle was set upon creation of the IEAgent, so you don’t
have to worry about getting the handle in any way. Simply place the handle
variable into this method’s parameter and it will open a tab inside the IE browser.
Note that if you want to open up a URL in another instance
of a browser (say you wanted to use Firefox or Google Chrome), you can call
that browser using this function and open up the tabs in that browser. This is
not always a good practice to do as it breaks a concept called encapsulation
in some ways, but for our purposes we will leave this option open. Because our
task is automating processes, it may be necessary to occasionally open up
another browser for whatever reason. Therefore we keep this method here as it
doesn’t make much sense to make a separate module to do this. This is an
example of when good form gives way to practical design.
Other Basic IE Functions
Part of automating processes is deciding what parts of the
process the user needs to see. Microsoft has developed a means to turn off
window visibility for IE, allowing you to navigate in IE without the user ever
seeing the browsing window. This has advantages as it doesn’t require IE to
render anything, so turning off visibility will create time savings.
To turn on and off visibility with the IEAgent, add the
following code:
'Set visibility of ie
Public Property Let visible(theValue As Boolean)
ie.visible = theValue
End Property
Public Property Let visible(theValue As Boolean)
ie.visible = theValue
End Property
To call this code, do the following:
ieAgent.visible = True
You can also set it False. This is a property function,
meaning that whatever you can set parameters in VBA using the = and not the .()
pattern. Personally I don’t like this method, but I thought that I would add it
in here to show a new way of setting variables in VBA. You may come across this
pattern in the future. I would avoid this and instead do the following:
'Set visibility of ie
Sub visible(theValue As Boolean)
ie.visible = theValue
End Property
Sub visible(theValue As Boolean)
ie.visible = theValue
End Property
To call this code, do the following:
Call ieAgent.visible(True)
You can use the first pattern to set any property of a class
object and also to run code. You can also get properties (like the handle for
the IE object in the IEAgent) by using the following code:
Public Property Get getHandle() As Long
getHandle = handle
End Property
getHandle = handle
End Property
Handle has been defined at the top of the IEAgent, and so
this is simply returning the variable.
Completed IE Tools
This concludes the portion of filling out the basic IE
functions you will need to automate IE. The next blog post will discuss adding
methods to navigate across the DOM.
Automating Internet Explorer (Add Dom Navigation)
The previous two posts have covered creating an IE automation
object. This post will build on this idea by allowing you to actually do things
with the webpage that is loaded. As discussed in the previous posts, the DOM is
the actual webpage that contains the data and information you see on the
screen. You can think of the DOM as being akin to a notebook with tabs – go to
a particular tab to get at information inside that tab. This is a very
simplistic view, but it illustrates the idea of grabbing a tab and then using
it to get the data inside of the tab. This tab may contain other tabs inside it
which will be easier to get at once you get the main (parent) tab.
In this post we will discuss wrapper methods, the Internet
Explorer (IE) document object, and a brief discussion about different ways of
using the IE object to achieve the same end goal.
Wrapper Methods
A wrapper method is essentially a method that allows you to
get at another method of an object inside another object. For example, our
IEAgent has an IE object inside of it that has a whole slew of useful methods
built in. Without a wrapper method there would be no way for us to access these
methods.
Wrappers are vital to help preserve encapsulation,
but more importantly they make it possible to use objects stored inside other
objects without pulling them out of the parent. It is like being able to unlock
your car over your phone – you just told something else to open the lock, and
that thing does it for you, but the end result will be the same.
One of the great advantages to creating wrapper classes when
automating IE is the ability to add the waitForLoad method described in the
previous post. This extends the functionality of the original IE object without
have to write a whole lot of custom code.
IE Document Object
Before we discuss some useful code to add into your IEAgent,
first we will discuss a bit more about the DOM and html. It should be noted now
that IE can do more than just read DOM objects. Indeed, IE is a very versatile
program in that it has built in Visio Document viewing, it can parse XML, JSON,
and other data structures, and perform a wide variety of other tasks.
Part of the problem with IE is that for years they were the
ones pushing the envelope on web technology, so they had to define their own
way of doing things. It wasn’t until some other people came in and pushed for
standards for the tech that Microsoft developed that MS was forced to not only
support the systems they developed, but also had to now include the standards
set by the industry if they wanted to stay competitive. For this reason there
are lots of issues in using IE to do anything over the internet, including reading
html documents.
Since IE is so extensible, it is hard to really say that
this is really automating IE so much as it is automating HTML DOM traversal
using IE. This post does not attempt to even come close to tackling all the
different ways you could automate IE, or even the different ways to automate
HTML traversal in IE since there are more ways than one for reasons discussed.
We will only one way to cover traversal across a DOM, but there are other ways.
The Document Object
With the previous discussion in mind, we will now cover the basic
structure that provides all the useful methods we need in automating web
browsing. As discussed multiple times, an HTML document is a Document Object
Model, or something that represents objects that can be manipulated by a
program.
Because of this fact, we can make assumptions about every DOM object in an HTML document, such as properties and methods that all DOM objects inherit. In IE, some of these are methods that allow you to grab all objects nested underneath a particular object of a given name, type, etc. Nesting is a crucial idea to understand, so I would read the attached article if you don’t know what this means.
Because of this fact, we can make assumptions about every DOM object in an HTML document, such as properties and methods that all DOM objects inherit. In IE, some of these are methods that allow you to grab all objects nested underneath a particular object of a given name, type, etc. Nesting is a crucial idea to understand, so I would read the attached article if you don’t know what this means.
Document models use the concept of tags to denote when an
object begins and ends. From here on out, we will refer to the objects in the
DOM as tags.
Grabbing Tags
The first thing you must be able to do in a DOM is grab a
particular tag and perform a method on it. This could be anything from
performing the click function on a button tag (which would correspond to
clicking on a button on a webpage in the browser) to getting all nested tags
within that tag. Both methods are essential in mimicking normal interaction
with an HTML document.
The first method we will add is grabbing a tag by it’s id.
Don’t worry if you don’t understand what an id is, or a class, or a name. Just
know that an id is a completely unique identifier on any webpage, so calling
this method will always return exactly one object, and that object will be of
the type that of the tag the id is identifying (hence the term id). A name is
not quite as universal because multiple tags can have the same name. The same
goes with class. But knowing that doesn’t mean that these can’t be useful to
helping automate the process. Indeed, many developers do not add ids to their
tags at all, so these become very useful because almost all developers will use
name and class tags.
Add the following code to your IEAgent:
Public Function getElementByIdWrapper(id As String) As
Object
Set getElementByIdWrapper = ie.document.getElementById(id)
End Function
Set getElementByIdWrapper = ie.document.getElementById(id)
End Function
As you can see this function will return an object. You
could also set this equal to IHTMLElement, but that level of specificity can
cause issues in some code. As long as you use this code to return to an object
that is of type IHTMLElement then you should will still be able to use
intellisense to help you code (we talked about intellisense in a previous post.
In actuality, you don’t need intellisense at all – you could make all things
objects and VBA will figure out what is supposed to be what on runtime, but
that makes for a difficult coding). Just know that the object is there to help
prevent some weird behavior in the IEAgent.
As discussed, the above method will grab the tag of the DOM
with the specified id. We will discuss in a later post how to determine the id
of a tag. The following three methods will grab multiple tags that contain the
given parameter:
Public Function getElementsByTagNameWrapper(tagName As
String) As Object
Set getElementsByTagNameWrapper = ie.document.getElementById(tagName)
End Function
Set getElementsByTagNameWrapper = ie.document.getElementById(tagName)
End Function
Public Function getElementsByNameWrapper(name As String) As
Object
Set getElementsByNameWrapper = ie.document.getElementById(name)
End Function
Set getElementsByNameWrapper = ie.document.getElementById(name)
End Function
Public Function getElementsByClassNameWrapper(className As
String) As Object
Set getElementsByClassNameWrapper = ie.document.getElementById(className)
End Function
Set getElementsByClassNameWrapper = ie.document.getElementById(className)
End Function
You will call each of these functions by setting an object
equal to the output of this method:
Set someObject = ieAgent.getElement<rest of Name
here>( parameter )
Each of these functions will return what is called an
IHTMLElementCollection (again, we just used object here). Since this is a collection,
we will be able to go over each tag in a for loop (defined later) to get at the
tags we want. Don’t worry right now about which method above to use, we will
cover that later. Just know that each of these will provide the functionality
we will need to navigate the DOM.
Further Wrapper Methods
The above examples give a very good pattern to follow when
creating a wrapper method. I will not go through each method as that is way
beyond the scope of this blog. The three that I have listed here will be able
to handle 95% of all your automating needs. If you want to add additional wrapper
methods, you can use the set <functionName> = ie.document.<predefined
function name> pattern and use this website
to add whatever methods you feel will be useful.
Other Methods to Achieve Document Automation
Due to the storied history of IE, there are different ways
of handling DOM navigation. I won’t provide any sort of code here except to
mention how you may access it.
One method that a lot of people who do what is called page
scraping (essentially what we are doing with these methods) is using something
called Regular
Expressions to find the exact part of the DOM they want to manipulate. The great
down side to this is that Regular expressions are difficult and messy. They are
very accurate, but it is not exactly clean code or easy to read. It also
requires the creation of other objects that will render the code you write into
something useful, and then you are dealing more with strings then you are
objects. If your purpose is to actually click on things in the DOM, you are far
better off doing it this way as it would probably require some more thinking
and problem solving to get to what you want.
In addition to that complexity, it doesn’t handle well pages
that would have a dynamic nature to the number of rows you wish to search for.
With the methods above you don’t have to worry about the rules of regular
expressions that would limit the number of fields you want to grab – you simply
write a loop and let the computer determine it for you every time.
Another method is using the document.all method on the DOM.
This will return all tags for you to then write your own methods, or to iterate
over them in certain ways, and use some other methods. But you are severely
limited in this scope if you don’t wish to write your own methods. However, if
you are clever, this method will make writing custom code much easier and
provides greater flexibility. For the reason of it being far more complicated
than we will ever need for our purposes, we will not be using this.
Finalizing the IEAgent
With these methods you have essentially made the entire
IEAgent that will be used in automating web browsing. There are a few
additional methods we should define before moving on. Each method doesn’t
really have a particular category to fit under except to describe them as being
some useful functions to help determine the state of a webpage, return some
values of the IE object, and so on.
The first method is used to return the IE object inside the
IEAgent:
Public Property Get explorer() As Object
Set explorer = ie
End Property
Set explorer = ie
End Property
Remember that we defined the InternetExplorer object as
being named ie. This simply returns that object when you call ieAgent.explorer.
You will use this code like this:
Set someObject = ieAgent.explorer
The next method returns the handle of the IE object:
Public Property Get returnHandle() As Object
returnHandle = handle
End Property
returnHandle = handle
End Property
And finally, this method will get the title of the webpage
you are viewing (the text that appears at the top of a tab):
Public Function getDocumentTitle() As String
getDocumentTitle = ie.document.title
End Function
getDocumentTitle = ie.document.title
End Function
This last method will be useful when writing a login method.
Conclusion
This concludes the discussion on creating an IEAgent to
automate IE. The next few posts will discuss how to navigate a DOM with the
methods we defined, how to determine what tags you will want to use, and how to
manipulate those tags.
How to Mount an Amazon S3 Bucket to a Ubuntu Linux File System
After many hours of struggling to utilize the vast power of Amazon Web Services for my internship, I finally have paid the time price and done enough research into how one actually puts together some of the services. One such connection is utilizing Amazon S3 storage as a filesystem in a Linux distibution, more particularly an Amazon EC2 Ubuntu distro. For information on how to set these up visit this site (it is really easy and so I won't cover it here). The following tutorial is more of an aggregation of several other tutorials with a few other useful techniques to make your server as current as possible.
Installing the Basics
The following is copied from an article posted on the AWS Developers forum (link here):
- Download the latest version of s3fs (which is a FUSE backend for S3) from http://code.google.com/p/s3fs/downloads/list wget http://s3fs.googlecode.com/files/s3fs-r177-source.tar.gz
- Unpack it: tar zxf s3fs-r177-source.tar.gz
- Install dependencies for building. In my Ubuntu AMI was:apt-get install build-essential libxml2-dev libfuse-dev libcurl4-openssl-devBuild and install the code (this copies the binary s3fs to /usr/bin):
- cd s3fs
A Few Items Left Out
We will depart from the tutorial at this point and cover a few things that it does not explicitly state that will be confusing if you are not familiar with Linux. Once in the s3fs directory you do not simply enter make install as this will throw a very unhelpful error. If you go to the FuseOverAmazon website, you will note that there is step missing (which turns out is necessary in most make calls):
- Enter ./configure --prefix=/usr
- Enter sudo make install
Creating a Config File for S3FS Access
Part of the listed tutorial covers a method on how to create a config file that s3fs will access when mounting a bucket to the filestystem. However, if you have tried this on a Ubuntu server, you realize that this does not work. Since I am not a Linux guru I cannot tell you why this is the case. However, I have made a simple process by which you can do the exact same thing but with more steps.
- Change directories to /etc (cd /etc)
- Create a new document titled passwd-s3fs (sudo passwd-s3fs)
- Change the permissions for the file to all user access (probably overkill, but it works: sudo chmod o+wx passwd-s3fs)
- Add the Access Key and Access Secret (sudo echo [Access Key]:[Access Secret] > passwd-s3fs)
- Change the permissions for the file to a restricted access (sudo chmod 640 passwd-s3fs)
Mounting a Bucket
Once the s3fs is installed, you are ready to add a bucket to the filesystem. Note that each bucket needs to be in lowercase letters in S3 as s3fs does not support uppercase letters. To add a bucket, do the following:
- Change directories to the directory you want to mount the bucket. I prefer the /home directory as it makes it simple to access all the buckets from a relatively open directory, but you can use whatever directory you want. (cd /home)
- Create a directory to place the bucket. (sudo mkdir myBucket)
- Enter the following command: s3fs -o allow_other -o use_cache=/tmp [bucket name] /home/myBucket
- Note that it is important to add the allow_other flag as not adding it will effectively hide the files from you and it will be almost like you didn't add the filesystem
- If you have directories in the bucket, you must add the directory inside the myBucket directory for them to show. Note that the directory must match the name of the directory in the bucket and it must also be lowercase. (sudo mkdir bucketDirectory).
- This only needs to be done if you can't see the bucket. It is more of a troubleshooting trick.
- Note that a new file will be added to your s3 bucket with the name of the directories. Don't delete these as they are used by s3fs to keep track of the directories in the bucket.
You should now be able to see your bucket! Congratulations!
Miscellaneous
This section covers a few miscellaneous notes about s3fs and other Ubuntu facts that I have learned that may be useful:
- Often times the error messages thrown are very unhelpful. The best option is to copy the message directly and Google for the solution.
- More often than not I have found that my biggest issue is that I forgot a step or didn't add sudo (super user access, which is like admin access on Windows) to the command. Be sure that you are doing everything correctly.
- Some distributions for some reason do not come with the linux command make installed. If this is the case you will find that running make on an install won't work. I can't remember if this throws a helpful error or not. If you are attempting to make the install and everything has been completed and it still doesn't work, make sure that the make command is installed.
- If you have buckets that you need to access that have uppercase characters, use Cloudberry to transfer files from one bucket to another. It is free and easy to use. To do this, simply open a bucket on the left pane and another on the right. It works much like a typical FTP client.
Updating Java - A More Excellent Way
If you have ever attempted to update Java to the newest edition (Java 7) you will have noticed that it is not as slick as some other Linux updates. Now that Oracle requires you to accept the Terms of Use Agreement it has made apt-get methods unusable. However, there is a way write by a group called web upd8 that runs a script on the linux machine that makes it as slick as apt-get. You can find out more about how to use it here. I have used it several times and it is a nice script that does most of the work for you.
Subscribe to:
Posts (Atom)